Sunday, July 24, 2011

Little Red

So, is anyone else out there, like a HUGE fan of the show "American Pickers"??!!!  'Cause I am!  It comes on the History channel every Monday night.  These two guys drive around the country in a cool Mercedes van digging through people's junks lookin' for what they call "Rusty Gold." 
Justin and I don't miss a single episode.

So, when the chance to pick through a local barn arose, we were there!  If you ever go pickin' through a barn, please note a few things:

1.  Be prepared for heat.
2.  Bring a flashlight.
3.  Don't bring your kids.
4.  Bring cash in small bills.
5.  Be prepared to spend some time.
6.  Don't bring your kids.

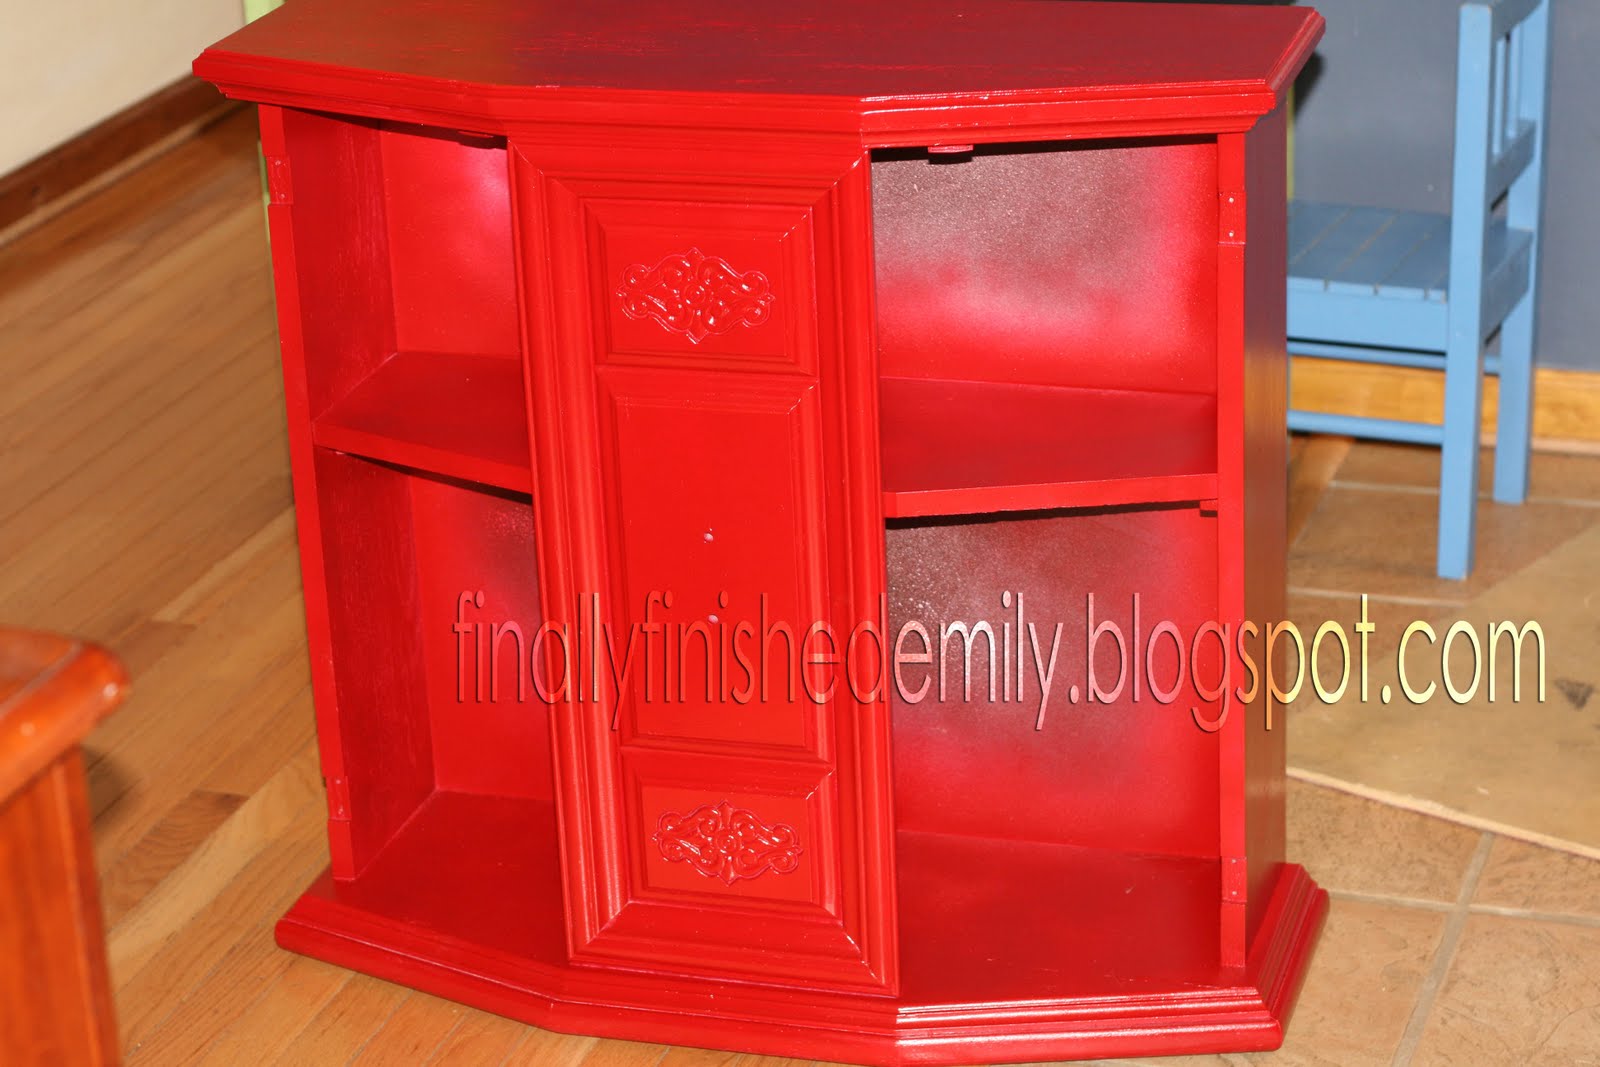
Because we weren't really prepared by following any of the above tips, our trip didn't last long.  But I did find a really cool treasure:


Okay, I'm not sure if you can really tell, but this is actually a child's chair.  You'll see.

Hello there!
This little red chair was just so cute!  But man, it was in rough shape.  There was some cracking, lots of chipped paint, and lots of dirt.  It actually kind of looked cool as it was, but I just had to make a project of it!

I wanted to do things the right way.  I stripped the paint down.  I know, you are probably thinking I was crazy to do that.  I have never done something like that either.  If you do it, please be very careful.  Read the instructions carefully.  Have a bucket or water hose close by...just in case.  ;)  I actually found a can of spray stripper.  It was $5 and the can got me through the chair.  The paint melted right off!  But I did fail when I didn't make sure to have chemical-resistant gloves on.  I went through a few pairs of gloves, and had to run to wash my hands several times 'cause my hands started to feel tingly.  Other than that, things went well.

Something else I realized later...probably shoulda worn a mask.  There is a good chance that red paint was lead paint.

All naked:
I can tell a lot of love went into making this chair by hand.  I can also tell that this chair is very very old!  I wish I knew more about where it came from...

Oh, I did sand it, too.  Annoying, but I felt it was necessary to do this right.

Next, priming it.

Remember, shake the can for at least 3 minutes, and you won't have to sand any more later on!

I actually was tempted to just keep it white.  It just looks so pretty!  The chair made such a good prop for some baptism pics I took for a friend.  Check it!


Finally!  Painting!  I used spray paint.  Brand: Krylon.  Blue Ocean Breeze in Glossy.
Here's where I should have showed you a "before" picture of what the chair looked like before I glazed it.  I will also have you know that my paint bubbled all over the place, so I had to sand it and repaint again.  I probably shouldn't have cared so much, but I really do want to do things the right way.

I glazed the chair using a white glaze.  Normally, I do black but I thought it would be nice to just give this chair some subtle dimension.  I like it.  It's almost hard to tell I did it but just check out the groove in the back of the chair.


Finally!  Finished!  Only took like 2 mos... :)

Wednesday, July 13, 2011

Happy Birthday to MEEEEE!!!!!!!

So today was my Birthday.
Not THAT one (yet).
I have 364 more days until I have to face that day.
If you don't know what I'm talking about, that's okay.  Don't worry 'bout it.

Anyways, so today was my Birthday.  Or as Thing 1 would say, "Dirthday." It was a good day.
Thing 1 ended up being pretty sick.  Had to take him to the doc.  No fun for him, poor Thing.  But he was being all snuggly and cute and cuddly so I enjoyed loving on him all day.  He is feeling better though. :)

We went out to dinner and Thing1 and Thing 2 were pretty well behaved, for the most part.

Then...finally, we get home and I get to open my present.

Well, it isn't actually here yet.  But it's coming!!

Not the laptop, silly, that cool printer thingy next to it!  It isn't a printer at all, actually.  It's a digital cutting tool!  It can cut all sorts of cool stuff like vinyl, magnets, heat transfer paper, fabric, paper and cardstock.  Here's some of the stuff you can apply these things to:

Not to be confused with a Cricut, the Silhouette SD does not require any cartridges.  Software is downloaded to your computer and you can download fonts and clipart stuff from their website for pretty cheap, or free even.  I'm excited 'cause I really don't want any kind of high maintenance machine.  Plus, I cannot keep track of cartridges.

The hubsters asked what I wanted for the Bday....this is one of the things I mentioned although I was torn because of course, I do not neeeeed one.  This is all just a guilty little pleasure for me.  The more I thought about it, the more I wanted.

So needless to say, I'm pretty happy that it's going to be here on Friday. :)

Also, just FYI.

I don't sCrapbook.  I did that a little bit and it's not for me. 

This will not be used for paper crafting of any type.  But probably more like doing wall art, glass etching, and iron on transfers for tshirts and stuff.

Eeeeek!!!

Sunday, July 10, 2011

Old Brown Couch

In my days as a young'un, my 'rents bought this awesome Cargo furniture. 
Yep, that's me and my dog, Pansey.

This furniture was pretty expensive aparently.


It was durable, that's for sure.
And comfy enough, I suppose!  That's me and my Grandpa.  I miss him!  Ohhh look at that awesome Lamp O'Beans on the side table!!  Food storage!!

My Mom changed the cushion covers many times through the years.


And so this lovely wooden furniture stayed with our family through 20+ years.  From Ft. Worth, TX to Findlay, OH to Fredericksburg, VA.

One day, it ended up in the garage.

Unloved.  Unused.  Unappreciated. 

{Side Story...real quick:  Years ago, Mom and Dad went to the Cargo furniture store in Northern VA to pick out all new cushions.  Mom let Dad pick the fabric...why why WHY!!!???  The lovely Southwestern print above is what he picked out.  Let me remind you we live in Fredericksburg, VA and this contradicts any kind of decor Mom already had}

Anyways...

Mom tried unloading the furniture.  But she just wouldn't let it get away without a price.

After all, the 'rents had spent beaucoup $$$ on this stuff back in the day.  I believe it!  This stuff is solid!

Well, as you know, I've recently started to find some beauty in some of the old, unloved, loney furniture in the world.  Could the Cargo furniture have some potential? 

I'll let you be the judge.


I wanted to do it the right way.  I used an electric sander.  Man, that was exhausting!  I'm not bein' funny, it make my muscles weak!  Then, I hosed the furniture off.  Dust, cobwebs, spiders....all gone!

All in 100*+ weather!  Lovely!

Next, priming.

Bam!  Justin and I really hesitated to do this, but we bought an electric paint sprayer thingy from Home Depot.  It was $69 well spent!  Once the paint was thinned out correctly, it took like 10 minutes to prime everything.  Awesome!

The brand was Wagner, I believe.

We did this because this is a BIG project...too big for having to use 20+ cans of $5 primer by Kilz.  Not gonna happen.

Now, the paint.  Again, used the paint sprayer....LOVE it!

I used Olympus brand paint in Almond Paste.

Now, this project actually was idealized by myself months ago.  During that time, I had browsed the web for fabrics to make new cushion covers.  I found the perfect fabric at The Fabric Guru.  There is a Clearance section online.  The fabric I chose was flawed at the edge, so it was super cheap.  I was confident it wouldn't be a problem, so I got something like 13 yards for $70 after tax and shipping.  Around $5 a yard is an awesome deal!

I have to recognize my Mom now because I really didn't help with the sewing of the cushions.  I just don't really know that much about sewing, plus my machine is awful.  She didn't seem to mind doing it.  It was a bit of a frustrating project at times because she had to start over and buy more fabric and stuff...but after all was said and done...it all turned out!

Of course, I glazed the furniture.  Ex-hau-sting!  But so worth it.

You ready for pics?!  Cause I am!

Hold your breath....


Oh.my.gosh...I LOVE it!! 

And you know what?  I'm happy for it to be a part of my little family.

I had a very happy childhood.

Lots of memories created while these couches sat and watched.

They're happy to be out of the garage. 

And I'm happy to have some space in there.

The Stairwell

Oooh this blog title sounds like it could be the title to a scary movie or something...
...yeah, something like that. 

The stairwell in our house was quite the project.  And I cannot really take credit for much of it.

You see, about 10 years ago the stairwell was changed.  Originally, it was carpeted and led straight to the downstairs.  But it was changed completely.  The carpet was totally removed.  Gone forever.  A landing was made right toward the bottom of the staircase and an opening was cut into the wall that led into the laundry room.

The reason for the change was because some family members needed a place to stay for a long while.  So my Dad and Brothers worked endlessly to make our basement into an apartment.

Now, Justin and I are renting the house.  Our landlord aka my Mom, wanted the opening to the utility room closed off and the stair case changed back.

Justin and my brother did that...but left it unfinished. 

This is pretty much what our staircase has looked like for more than a year:

Okay, it didn't really look this bad for the entire 10 years.  The banister on the stairs was installed.  But do you see on the right wall all the drywall compound?  That is where the opening used to be.  The stairs themselves are plain ol' wood.  They are deadly, too. 

So, it took about 2 weeks but Justin finally finished smoothing out the drywall compound.  We both helped to paint the stairwell.  I got to pick the color.  It is a gray color made by Olympus called "Secret Passage."  I also painted the railings and banisters white.

Before.


After.

What do you think?


Painting the railing was SUCH A PAIN!!  I hated every moment of it.  I am much too lazy to be brush painting.

When it came to painting that banister, I cheated and spray painted it with Krylon Glossy White.  Sure, the whites aren't exactly the same but I am the only one who knows that. :)

The best part of this project is that we had carpet installed!  I am so happy to have carpet back on the stairs.

The stairwell project was a small accomplishment.  We are going to be painting the entire house.  I have the pallette all picked out and I am SO excited. 

It has taken a while to get started though.

One day at a time....one project at a time.

My Favorite {finished}

This next project is by far my favorite!  Okay, between the blue desk and this I guess it's not hard to pick favorites, but I just really love how this turned out!
Here's how it all began...remember, this is a blog so I will blab when I want to.
Saturday mornings at my house are usually pretty early.  The boys are so used to waking up early.  I consider myself pretty lucky the mornings I get to sleep 'till 7 a.m.  So usually we'll all get ready and go out the door lookin' for stuff to do.  We were wanting to go browse around thrift stores, but nothing is open until like 10 a.m.!  We were headin' on home down Princess Anne Street when I spotted a man unloading stuff onto the curb outside his thrift shop. 

We parked.  We asked if he was open.

He wasn't.  He said we could look around though.

I walked into the store and immediately spotted her.  She had crap sitting on top.  It looked like the store owners were using her.  I wanted to inquire but the man was preoccupied. 


I wanted to look around more, but Thing 1 and Thing 2 would not have it.  They don't do so well when we go anywhere and this occasion was no exception.

Sadly, we had to leave. Empty handed.

I thought about her all week long.  I wondered if any one else had snatched her up.  I was sure she was gone.

The next Saturday, I snuck over to that thrift shop when I was supposed to be coming home from a baby shower.  My heart skipped a beat when I saw her!  Still there!  I immediately inquired as to what this beauty would cost.  In my head, I figured $30 was my limit but my heart told me to stop at no limit! 

$20 bucks.

Yep, $20.  And the guy started muttering about how it was worth like $300 or something.

He let it go for $20.  I didn't even haggle. 


So, I took her home and dragged her out to the back deck.  I immediately got to work cleaning, removing hardware and gathering supplies.

Thing 1 and Thing 2 helped clean her up.  Toothbrushes and all.  This was serious business.  She smelled funky and there was no way she could ever come inside in that condition!


While the cabinet was drying, I sat in front of the TV and sanded all the hardware.
Middle one is done.
Next, priming.  Remember to shake the can for like 3 minutes first!

I went bold with the paint and chose Krylon's Cherry Red.  I was a little anxious about it, too.


If you ever spray paint anything with Cherry Red, be prepared to buy more cans and do several coats! 

Here's what she looked like all painted...


Yikes!  That is BRIGHT!  And the carved details are totally lost.  Soooooo I glazed it. 

I LOVE it!!  And do you love the hardware!?  Spray painted it in Rustoleum's Hammered. 


Wait!  She's not done yet!

My favorite part:


The fabric I bought from the quilting fabric section.  It's actually much wider than the standard 42", but it's also much thicker.  I glued it in with tacky glue. 

So, this little project probably cost me like $30 for all the paint and supplies.  Total cost:  $50.  I have seen similar pieces of furniture like this at Kirkland's and they cost like $250-$300 brand new.

I think I got a pretty good deal. 

To Blue

Several months ago, a friend of mine introduced me to this awesome web site called
All Things Thrifty
The gal who runs it is a "thrift store junky."  She loves to take old junky stuff and turn it into something amazing.  After looking through her blog, I was totally inspired and on the hunt!
Justin spotted this desk at a yard sale.
$5.00
Fancy, huh!?
Yeah, not so much.  These types of desks can be found pretty much anywhere.  And they're all totally boring.
Justin had settled into his desk...hehe
I came along and literally pulled it out from under him!  I carried it outside and got to work.
First, removing the hardware.
Second, cleaning it off.
Third, priming it.  That's right.  No sanding.  And you can probably tell that it's a veneer finish. 
This pic here is about 2 or 3 coats of primer.


I used a spray primer called Kilz.  It's pretty awesome but it left a gritty finish and I did have to sand it down with a fine grit sandpaper (220). 
I learned how to avoid this for future reference:  shake the can for 3 minutes straight and you should be good to go!
Next, the color!  Because he was being such a good sport, I let Justin pick the color.  He told me he wanted it to be blue.  And so it became!
I bought Krylon's beautiful Global Blue in Glossy.  I chose Glossy, as is recommended by Brooke at ATT.
Isn't that such a pretty color?!  I later learned that this is one of Krylon's colors that is only available regionally or something.  I feel so priveledged!
Okay, enough chatter...get to paintin'.
This is after 1 coat of paint.  Man, I was hoping not to have to keep going.  I had only bought like 2 cans of paint and had to go back for more.  There is a technique to spray painting.  The nice thing about Krylon is the nozzle adjusts so that it covers better, depending on the direction you spray in.  I'm so lame, but I totally watched a video on how to do this right.  I still didn't do that great of a job though.  Here's a piece of advice:  do NOT spray with your wrist...meaning don't move your hand back and forth.  Move your entire arm.  Does that make any sense?
I am much to cheap to buy new hardware, so I spray painted the original hardware in Rustoleum's Hammered.  It sprays texture onto it.  So cool!

Isn't she so pretty!?  That's right, this desk is a GIRL!  With 3 guys around all day, I have to assign gender to inanimate objects.
But wait... she's not done yet!  I want to make the desk look all old and antiquey...
So, I did what is called "Glazing." 
I think I bought the Martha Stewart Faux Glaze at Lowe's.  Then, I bought one of those small samplers of black paint.  Follow the directions for tinting the glaze.  If you try this at home, just note that you won't need very much.
Just paint the glaze on...jam it into the little crevices everywhere.  I find that wiping it quickly with a wet towel, and then wiping it again with a dry towel does it very quickly and looks nice!
Here's how she turned out:

I know, the lighting is bad in this pic and there's weird shadows every where.  Look closer:
And look inside!

My favorite part!  Fabric from JoAnn's.  Cut to size and glued in.  A lot of people have asked how I glued it in.  I tried the spray glue stuff but it really doesn't adhere well...especially since there was primer sprayed into the drawer.  So I pulled it out and reglued it with lots of tacky glue.

I love the desk! 

Now...to find the perfect chair to go along with it.  Imagine the seat covered in that harlequin fabric...

...to be continued...